If you follow me on Instagram, you may have seen a post awhile ago about Ivy’s obsession with her Mickey Mouse color and shape flashcards that we picked up at the Dollar Tree. For quite a while, those were her most played with/most requested “toy” when she was home. I found it so funny that she had a room full of toys to play with and all she wanted was to play with the cards. But, as most toys do, the excitement wore off and those cards sit in her toy bin, waiting for another chance to be played with.

This post contains affiliate links, which means I may receive a small commission, at no cost to you, if you make a purchase through a link. See my full disclosure here.
While searching for toddler activities on Pinterest one day, I came across a super cute set of color matching popsicles being sold on a Montessori-themed Etsy shop. While the price of the set is totally reasonable, I knew this was a DIY I could tackle myself. The project was SUPER simply and required minimal materials, most of which I already had on-hand, making it inexpensive, too. I used my Cricut to cut out everything but the project could easily be done with a pair of scissors or an Xacto-knife.
What You Will Need
- Craft Foam Sheets
- Large Popsicle Sticks
- Hot Glue Gun w/ Glue Sticks
- Cricut (optional)
- Scissors or xacto-knife (if not using a Cricut or other die-cutting machine)
- Popsicle tracing template (if not using a Cricut or other die-cutting machine)
Instructions to Make Color Matching Popsicles
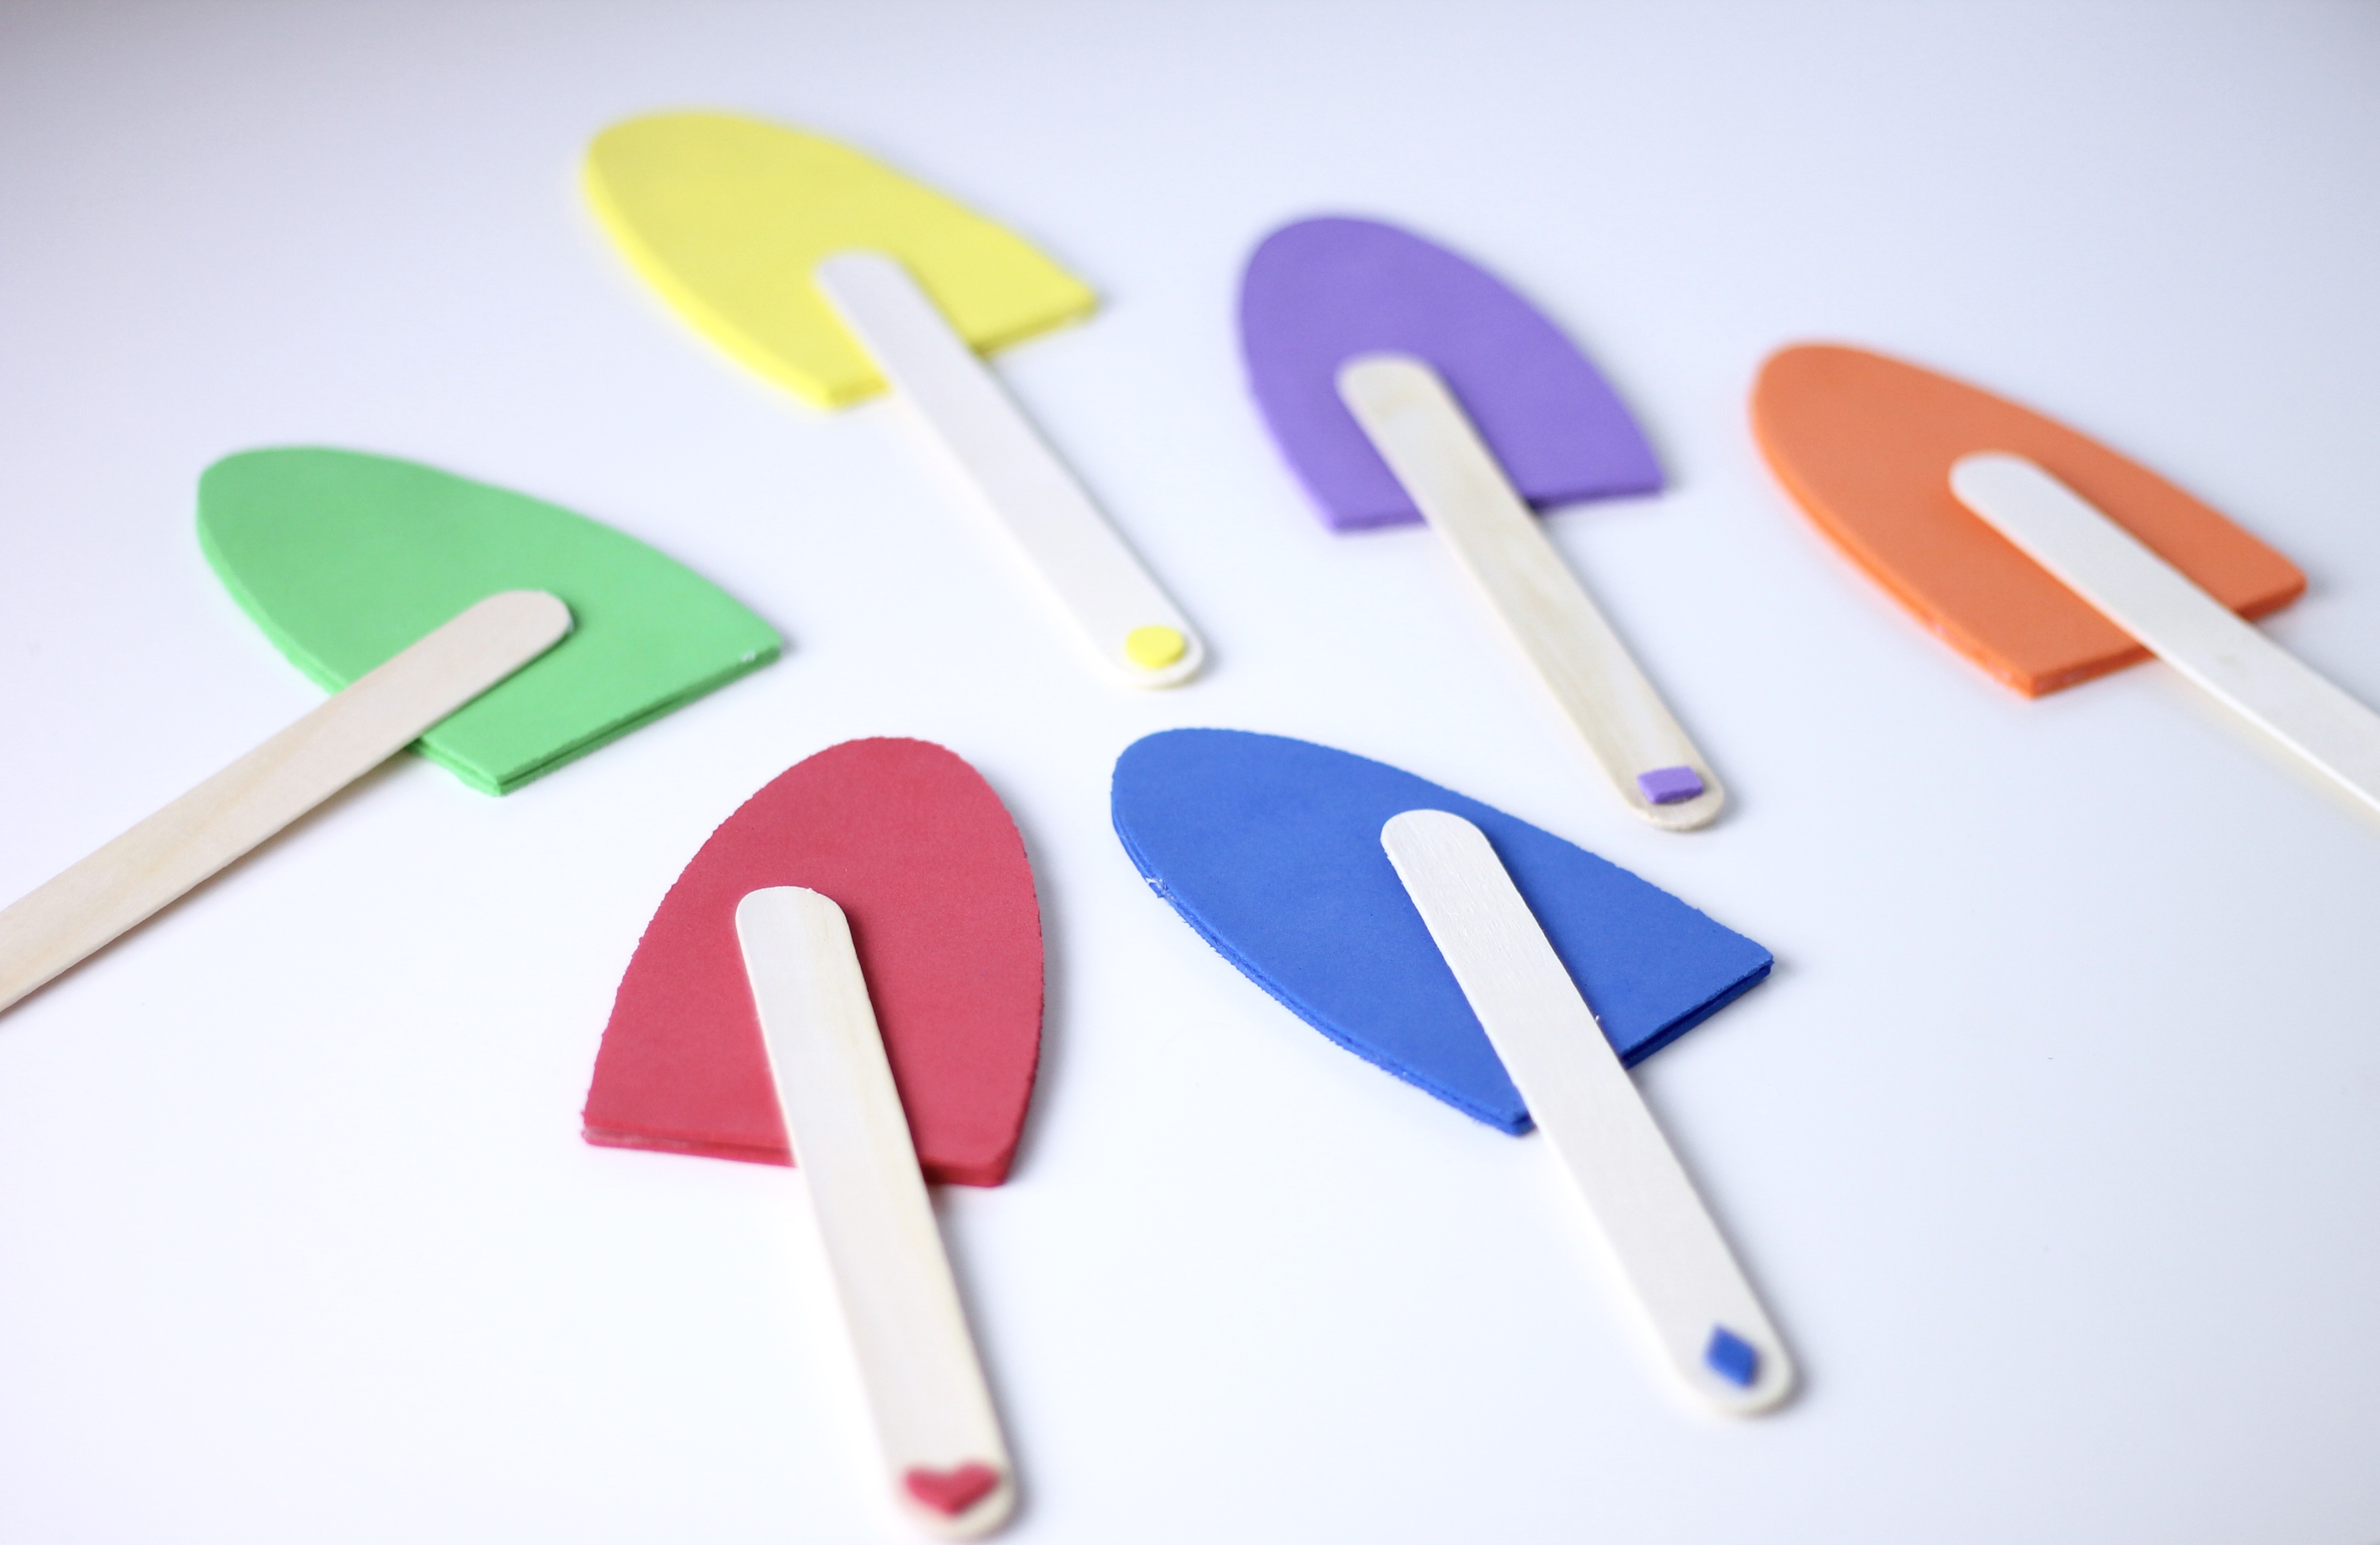
- Choose what colors you want for your color matching popsicles and set foam sheets aside (I chose the primary colors to start – red, green, blue, orange, purple and yellow; I may end up making additional pops with other colors once I see how much these get used)
- If using a Cricut, upload or create the popsicle shapes into Design Center & cut out for each color (you will want two popsicle tops in each color). If you don’t have a Cricut, print out the popsicle tops from the tracing template onto cardstock and trace the popsicle top onto your color twice, then cut with scissors or x-acto knife
- You will also need to cut out the shape(s) you’ll use on the popsicle sticks. If you want to just have these be used for color matching, you can choose one shape to use for all the colors
- If you want to use this for color and shape matching choose a different shape for each color. I cut out a heart, circle, diamond, square, rectangle and triangle. You’ll need two small shapes for your popsicle sticks and two larger shapes to glue onto the popsicle tops
- Using hot glue gun, glue around the outside curve of the popsicle top and about 1/4 inch in on the bottom (IMPORTANT! Make sure you leave enough open space at the bottom of the popsicle in order to slip in the popsicle stick otherwise your kiddo won’t be able to match up the stick to the popsicle top!)
- Next, glue the smaller shapes onto the bottom of your popsicle sticks
- If doing shape and color matching you’ll also want to glue the larger shapes to the outside of the popsicle top (not shown below)

These look so cute when they’re finished. And what better time to play with “popsicles” than summertime! I’m already thinking of how we can prolong their use after Ivy’s “mastered” her colors and shapes. Maybe adding numbers or letters?
What do you think? Would your toddler get use out of these? If you decide to make these on your own, tag me on Instagram so I can see!

What a great idea!! My girls would love this.
Thanks, Caroline! You’ll have to let me know if you make them and how they like them.
What a cute summer activity for kiddos and I love that it’s a DIY!!
Thank you, Holly! I’m hoping to get a lot of use out of them this summer 🙂